Understanding CPAP Maintenance
Did you know that nearly 50% of CPAP users struggle to adhere to their therapy due to equipment issues? Proper maintenance of your CPAP machine is not just about keeping your device functional; it’s about maximizing the health benefits of your therapy. A well-maintained CPAP machine can lead to better sleep quality, improved breathing, and enhanced overall well-being.
However, many users face common challenges—like discomfort from dirty equipment or frequent breakdowns—that can hinder their treatment effectiveness. Regular maintenance is essential to ensure your CPAP machine operates smoothly and efficiently. From cleaning routines to replacement schedules, taking proactive steps can extend the life of your device and optimize its performance. Ready to breathe easy? Let’s dive into seven essential CPAP maintenance hacks that will help you keep your device in top shape!


Regular Cleaning Routines
Establishing a regular cleaning routine for your CPAP machine is crucial for maintaining your health. All parts of the device—mask, tubing, and water chamber—can harbor bacteria and allergens, potentially impacting your sleep therapy. Here’s how to keep everything clean and fresh:
Cleaning the Mask
Frequency: Daily
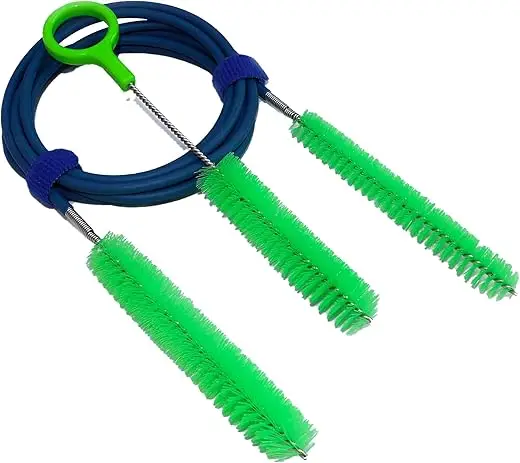
Tubing Maintenance
Frequency: Every 1-2 weeks
Water Chamber Care
Frequency: Weekly
Routine cleaning not only enhances your comfort but also boosts your CPAP’s effectiveness, ensuring you reap maximum benefits from your therapy.
These wipes can be a handy tool for quick mask cleanings on busy days.
By establishing these cleaning habits, you can avoid common issues that lead to therapy interruptions. Next, let’s explore the essential techniques for properly storing your CPAP equipment when it’s not in use.
Proper Storage Techniques
Effective CPAP maintenance doesn’t stop at cleaning; proper storage plays a critical role in keeping your machine and its components safe from damage. When not in use, how you store your CPAP gear can significantly impact its longevity and performance.
Dry and Cool Environment
One of the biggest threats to your CPAP machine is humidity. Excess moisture can lead to mold growth and electrical issues, while extreme heat can warp plastic components. Aim to store your CPAP machine in a dry, climate-controlled area, ideally at a temperature of around 60-80°F. Avoid drawers or cabinets that are prone to temperature fluctuations, as these conditions can harm your device over time.
Dust and Debris Control
Dust is another enemy for CPAP machines. To keep your equipment clean and functional, consider using a protective cover or case when your machine is not in use. This will not only shield it from dust but also guard against accidental spills or impacts.
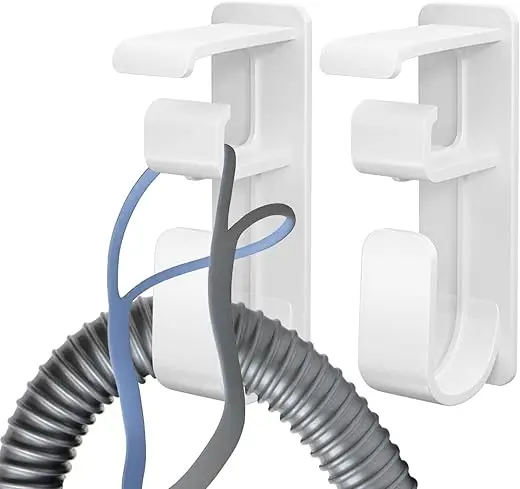
Organizing Components
Always keep your CPAP parts organized. Use a separate, labeled container for tubing, masks, and other accessories. This will prevent tangles and reduce the risk of losing critical components. Additionally, keep all manufacturers’ instructions nearby to reference specific storage recommendations for particular parts.
By following these best practices in storage, you ensure that every time you’re ready to use your CPAP machine, it functions optimally. It also helps mitigate damage-causing factors, extending the lifespan of your equipment. With your device securely stored, let’s move on to the importance of replacing filters and parts regularly to maintain peak performance.
Replacing Filters and Parts
One of the most crucial aspects of CPAP maintenance revolves around the timely replacement of air filters and other replaceable parts. Neglecting this essential task can compromise not only the performance of your CPAP machine but also your overall sleep quality and health.
The Importance of Filters
Air filters play a vital role in ensuring that the air you breathe while using your CPAP machine is clean and free from pollutants. Over time, filters can become clogged with dust, allergens, and other particles, which may lead to increased resistance and reduced airflow. This not only impacts your comfort but can also decrease the efficacy of your therapy.
How to Check for Wear and Tear
To keep your CPAP running smoothly, it’s important to regularly inspect its filters and parts for signs of wear and tear. Here’s how:
Having a supply of replacement filters on hand ensures that you won’t be caught off guard when it’s time to change them. They’re essential for maintaining optimal air quality and comfort.
Signs That It’s Time to Replace
In addition to scheduled changes, awareness of specific signals can aid in determining when replacement is necessary. If you notice increased snoring, daytime fatigue, or a return of sleep apnea symptoms, check your filters and other parts for replacements.
By routinely assessing and replacing your CPAP’s filters and components, you can significantly enhance its functionality and protect your health. Armed with this knowledge, you’re better positioned to troubleshoot common issues that may arise with your equipment—leading us smoothly into our next section.
Inspecting for Damage
Regularly inspecting your CPAP machine and its accessories for signs of wear and tear is essential for long-term efficacy and safety. Damage, whether minor or severe, can compromise your sleep therapy and lead to potential health implications. If left unchecked, a simple crack or frayed hose can cause air leaks, reduce pressure, and ultimately make your device less effective.
What to Look For
When conducting your inspection, consider the following checklist:
Implications of Using Damaged Equipment
Using damaged CPAP equipment can have serious consequences. Not only can it lead to insufficient therapy, but it can also heighten the risk of respiratory infections and other complications due to bacteria build-up. Moreover, air leaks from damaged equipment can disturb your sleep quality, defeating the purpose of your CPAP therapy.
By staying vigilant and routinely inspecting your device and its parts, you can enjoy a restful night’s sleep and avoid costly repairs or replacements. With this proactive approach, let’s now explore the various cleaning devices available that can assist you in maintaining your CPAP effectively.

Utilizing CPAP Cleaning Devices
As the landscape of CPAP care evolves, the introduction of specialized cleaning devices has revolutionized how users maintain their equipment. These innovative tools not only simplify the cleaning process but also enhance the efficacy of your CPAP therapy.
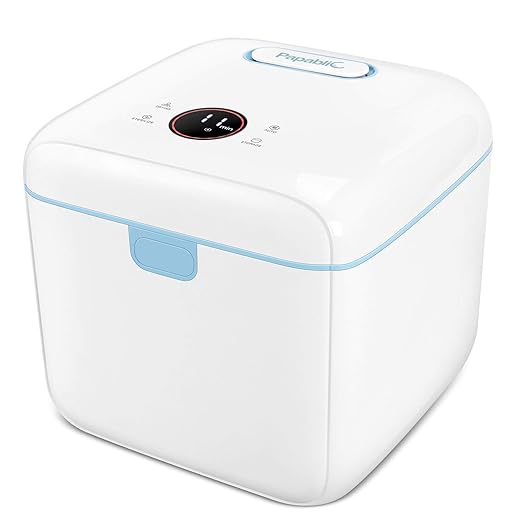
Exploring the Options
There’s a variety of CPAP cleaning devices designed to suit different user preferences and cleaning needs:
Benefits of Cleaning Devices
The advantages of using these devices are manifold:
Considerations for Choosing a Device
When selecting a CPAP cleaning device, consider factors such as:
With your understanding of cleaning devices expanded, your CPAP maintenance arsenal is now more robust. In our next section, we will tackle common troubleshooting issues you may encounter with your device, ensuring you’re prepared for any hiccups along the way.
Troubleshooting Common Issues
Even with diligent CPAP maintenance, users may encounter a few common issues that can disrupt their sleep therapy. Learning how to troubleshoot these problems not only empowers you but can save you from unnecessary consultations or repairs. Here are some straightforward tips to help you tackle noise, leaks, and discomfort effectively.
Identifying Noisy CPAP Machines
Increased noise from your CPAP machine can be a nuisance and disrupt your sleep. If you notice this, try the following:
Addressing Air Leaks
Air leaks can significantly affect CPAP efficiency and comfort. To diagnose and remedy this problem:
Managing Discomfort
Discomfort during sleep can stem from various factors, including mask fit, air pressure, or moisture build-up:
Conclusion
These troubleshooting tips are your first line of defense against common CPAP issues, ensuring that you can quickly get back to enjoying restful sleep. With this foundation laid out, we will now transition into establishing a maintenance schedule to keep your CPAP machine in optimal condition for the long haul.

Establishing a Maintenance Schedule
Creating a personalized maintenance schedule for your CPAP machine is essential to ensure it operates at its best while prolonging its life. Consistency is key; just like following a health regimen, regular upkeep of your device can lead to improving your overall sleep quality and reducing unforeseen disruptions.
Frequency of Maintenance Tasks
A well-structured maintenance schedule can help you keep track of cleaning, inspections, and parts replacement. Here’s a straightforward approach to when you should perform these tasks:
Benefits of Consistent Maintenance
Sticking to a maintenance schedule offers numerous advantages:
By adopting this structured approach, you are well on your way to ensuring your CPAP machine remains dependable. Now, as we wrap up, let’s move towards the importance of committing to proper care for your CPAP machine.
Commit to Caring for Your CPAP Machine
Maintaining your CPAP machine is crucial for ensuring its effectiveness and durability. By implementing the seven essential hacks discussed—regular cleaning routines, proper storage techniques, timely filter replacement, damage inspection, utilizing cleaning devices, troubleshooting common issues, and establishing a maintenance schedule—you can significantly enhance your overall health outcomes.
Remember, a well-cared-for CPAP machine not only offers improved sleep quality but also extends the life of your device. Make a commitment today to prioritize your CPAP maintenance. Your body—and your sleep—will thank you!

I love how this article laid everything out! The step-by-step guide makes it all seem doable. Thanks! I’ll definitely check out those products mentioned.
Thanks for the feedback, Daniel! Let us know which products you end up trying!
Yes! I’m thinking about getting that UV sanitizer too!
The troubleshooting section was super helpful! I had no idea I could fix some of those issues on my own. 😄
So happy you found it useful, Fiona! Many common issues can be solved easily!
Right? I think I saved a call to customer support thanks to those tips!
Wow, these hacks are a lifesaver! I never knew I should be cleaning my CPAP tubing so often. Just ordered that cleaning brush kit from Amazon! Can’t wait to see the difference. Thanks for the tips! 😊
I always thought cleaning was just a hassle, but now I feel motivated to stick to a schedule. What do you think is the most important part to clean regularly?
So glad you found the tips helpful, Samantha! The cleaning brush kit makes a huge difference in maintaining your CPAP.
Just got the RemZzzs liners, and I’m in love! They’ve made such a difference in comfort. Highly recommend! ❤️
I’ve been thinking about trying those too, but are they worth it for the price?
Thanks for sharing your experience, Jenna! Comfort is key when it comes to CPAP.
I didn’t realize you were supposed to store the CPAP in a specific way. I’ve just been tossing it in the drawer! 😂
Haha, it happens! Storing it properly can prevent damage and keep it clean.
I keep mine on the nightstand, but I cover it to keep dust off.
The replacement filters are a pain to change! Anyone else find it annoying? 😅
They can be tricky, but staying on top of it helps the machine run better!
I just bought that Dreamstation 2 filter pack. Anyone know if it’s easy to switch out?
For sure! I wish they made it easier to access.
I love the idea of a maintenance schedule, but keeping up with it sounds exhausting! How do you guys remember to do it?
Setting reminders on your phone can help! Or maybe a calendar at home?
I just tied it to my other chores like laundry. Just makes sense to do it all together.
I’m new to CPAP and feel overwhelmed with maintenance. Any tips for a newbie?
Start simple! Focus on cleaning the mask and tubing regularly. It gets easier with time.
I agree! Just make it part of your daily routine and it won’t feel like a chore.
This article is great, but I wish there were more details on how to inspect for damage. Like, what exactly should we look for? 🤔
Yes, I agree! I’ve had issues in the past because I didn’t check properly. Maybe we need a checklist or something!
Great question, Tom! Look for cracks in the mask or tubing, and ensure there are no leaks. If you’re unsure, feel free to ask!
I’m curious about the unscented wipes. Do they actually clean well or just freshen up?
They do a decent job at cleaning, but it’s best to use them as a quick freshening up between deeper cleans.
I personally find them great for daily use, but I still do a thorough clean weekly!
Using a UV sanitizer seems a bit overkill, doesn’t it? I mean, soap and water work just fine, right?
I thought the same at first, but turned out my colds were coming from my CPAP. Now I use it regularly!
While soap and water are great, UV sanitizers can kill germs more effectively, especially if you’re prone to colds.